The Preparation
The airworthiness inspection process actually began several months before the actual inspection took place. I started the process by reaching out to the Designated Airworthiness Representative (DAR) I wanted to use via email. My search for a DAR was made easy as there is a relatively local DAR who is very familiar with Sonex aircraft. After making initial contact with him about three months out for completing, he informed me that he would be willing to make the two hour drive for the inspection and to let him know when I was a little closer to the aircraft being complete.
I opted to reach back out to the DAR after completing the initial weighing of the aircraft as part of the paperwork needed for the airworthiness application depended on having sample weight and balance problems. The first official step of the process was to prepare an airworthiness certificate application in the FAA’s AWC system. As one might imagine, this process of the airworthiness inspection was by far the most difficult to complete. My best piece of advice is to purchase EAA’s Amateur-Build Certification Kit, read it twice, and follow the steps and checklist very carefully. My DAR also provided some instructions that supplemented EAA’s kit. As part of the application, I had to upload four documents and attach them to my application. It is worth mentioning that I sent these documents to the DAR prior to attaching them to my application for his review:
- Program Letter – I used the template from EAA’s kit and only made small changes. The two changes I made were to specify that I was going to use the EAA Flight Test Manual to utilize the task-based approach to flight testing as specified in AC 90-89 and a request to utilize the Additional Pilot Program. Note that the FAA office this letter is addressed to is not your local FSDO but the office of your DAR (mine was addressed to the Minneapolis Certificate Management Section).
- 3-View Drawing – I simply attached sheet SNB-B01 from my plans set (a copy of this sheet is available on the Sonex Website to make it easier)
- Weight and Balance Report – This is a combination of the weight and balance report you generate when you weigh the aircraft and four sample weight and balance problems: empty weight, most aft CG, most forward CG, and first flight weight and balance. For the sample problems, follow the guidance given in EAA’s kit. Note that the most forward and aft CG problems should use the FAA’s standard weight of 170 lbs; do not try to adjust pilot weight to reach most aft or forward CG. There is also guidance in the kit on min fuel for either problem.
- FAA Form 8130-12 – This form gave me the most headaches and needs to be notarized so it’s easiest to get it right the first time. The name in section 1 needs to match the FAA’s registration records EXACTLY and should only be the primary owner’s information (if aircraft is co-owned). For example, the FAA rejected “Evan Krueger” and stated that the name needed to be “KRUEGER EVAN M”. If you did not use commercial assistance during the build, make sure to type “N/A” under both name lines in section III just as the instructions say. Finally, only the PRIMARY REGISTERED OWNER needs to sign at the bottom (in front of the notary); not the builders as the field might suggest.
All in all, it took about a week of back and forth with the DAR and the FAA to have my application accepted. The AWC system will send an email letting you know once the FAA has accepted the application.
After the application was squared away, a date and time was set for the inspection. It happened to work out that the inspection was scheduled to take place on a day the DAR was in the area for an unrelated event and could complete a different airworthiness inspection at my airport for another applicant. Both these factors helped save me money in paying travel costs.
The Inspection
Prior to the airworthiness inspection, I made sure to complete my condition inspection following the checklist I had developed from other examples available around the web. I left the aircraft in an “open condition” with the cowling, inspection plates, and interior components removed from the aircraft. For the inspection, I made sure my build log, aircraft plans set, (empty) logbooks, registration and admin docs, and the recently completed inspection checklist were available for review. The DAR’s portion of the inspection was pretty straight forward and involved a non-invasive inspection of the aircraft and photographing compliance items along the way. Right off the bat, he identified the data plate (side note: information on the data plate must match the registration card EXACTLY!), the “experimental” decal, the passenger warning, and cockpit control and switch labeling. In general he worked his way from the front of the aircraft to the rear checking overall condition and workmanship. Special emphasis was placed on control linkages, hardware, and correct rigging, that the nav lights were installed on the correct sides, and all jam nuts were tight on rod ends. He identified a few small “squawks” that I had not previously considered previously that I addressed after his visit:
- Placing silicone strips or “Rescue Tape” underneath the zip ties attaching wire bundles to the engine mount to prevent the zip ties from wearing though the powder coating on the motor mount. I had thought the plastic would wear first but this might not be the case if dust becomes trapped under the zip ties and acts as an abrasive.
- Running a thin strip of high-temp RTV across the exhaust spring coils to help dampen vibrations and prolong the life of the exhaust springs.
- Placing a “witness line” or torque seal across the oil filter and motor to help identify if the oil filter is starting to loosen since the Jabiru uses automotive-style filters that do not come with provisions for safety wire.
- Flipping the bolts connecting the rudder cables to the rudder pedals so that the cotter pins face outwards rather than inwards. The DAR shared a story in which pants or shoes could break off the cotter pins and disconnect the rudder pedals from the tailwheel causing loss of control.
After the DAR completed his inspection of the aircraft, we moved on to completing the paperwork for the inspection. The DAR wanted to see each logbook for the aircraft and my logbook entry for the build and condition inspection. I opted to print these entries on label paper and asked him to review them prior to me signing them and placing them in the logbooks. I found little guidance on this subject so here are the entries I used to document the build, condition inspection, ELT inspection, and the couple of service bulletins I completed as part of the build:
Airframe
I certify that this aircraft has been constructed in accordance with the Sonex and Sonex-B construction plans issued by Sonex Aircraft for serial number 0849B as documented in the aircraft build log. Standard aircraft maintenance practices found in AC 43.13 and component installation manuals were followed. Equipment installed as part of construction is detailed in the Aircraft Operating Handbook – Revision A. Installed Jabiru 3300 (S/N 33L-131/33A-2713) powerplant IAW JEM3302-9 and Sonex/Jabiru Installation Guide – Rev G. Installed Prince 54/60PK (S/N 8731P54AT60LK) propeller IAW Sonex Construction Plans and Prince Installation Procedure document. The following service bulletins were completed as part of aircraft construction: Garmin 26089A; Sonex SNX-SB-002, SNX-SB-006, SNX-SB-011, and SNX-SB-015; ACS SB24-01.
Inspected and tested ELT IAW FAR 91.207(d) and ACK E04M – Rev 1.6. Batteries expire 11/15/2029 (ELT), 06/19/2031 (RCPI), and 09/30/2034 (Audio Alert).
Inspected aircraft IAW N830EH Condition Inspection Checklist – Rev A. I certify this aircraft has been inspected in accordance with the scope and detail of Appendix D to Part 43 and has been found to be in a condition for safe operation.
Engine
Engine installed into N830EH – Krueger Evan M Sonex-B (S/N 0849B) IAW JEM3302-9 and Sonex/Jabiru Installation Guide – Rev G. Inspected engine IAW N830EH Condition Inspection Checklist – Rev A and FAR Part 43, Appendix D. Drained preservation oil and replaced with 3.8 Qts Shell 15W-50. Replaced oil filter with NAPA Gold 1394. All spark plugs replaced with NGK D9EA. Performed compression test with the following results: C1: 76/80, C2: 75/80, C3: 75/80, C4: 74/80, C5: 76/80, C6: 76/80. The following service bulletins were completed as part of engine installation: Jabiru JSL014-5. Performed engine run-up; all operational and leak checks good. I certify this engine has been inspected in accordance with the scope and detail of Appendix D to Part 43 and has been found to be in a condition for safe operation.
Prop
New propeller installed onto into N830EH – Krueger Evan M Sonex-B (S/N 0849B) with Jabiru 3300 (S/N 33L-131 / 33A-2713) powerplant IAW Sonex Construction Plans and Prince Installation Procedure document. Propeller inspected IAW N830EH Condition Inspection Checklist – Rev A and FAR Part 43, Appendix D. Propeller bolts torqued to 210 in/lbs. I certify this propeller has been inspected in accordance with the scope and detail of Appendix D to Part 43 and has been found to be in a condition for safe operation.
After these entries were signed and placed in the logbook, he placed his log entry in the airframe logbook indicating that a special airworthiness certificate was issued followed by a handshake and congratulations. All in all, the inspection took around 2.5 hours and cost less than $200 (a steal in my opinion since I didn’t have to pay travel costs).
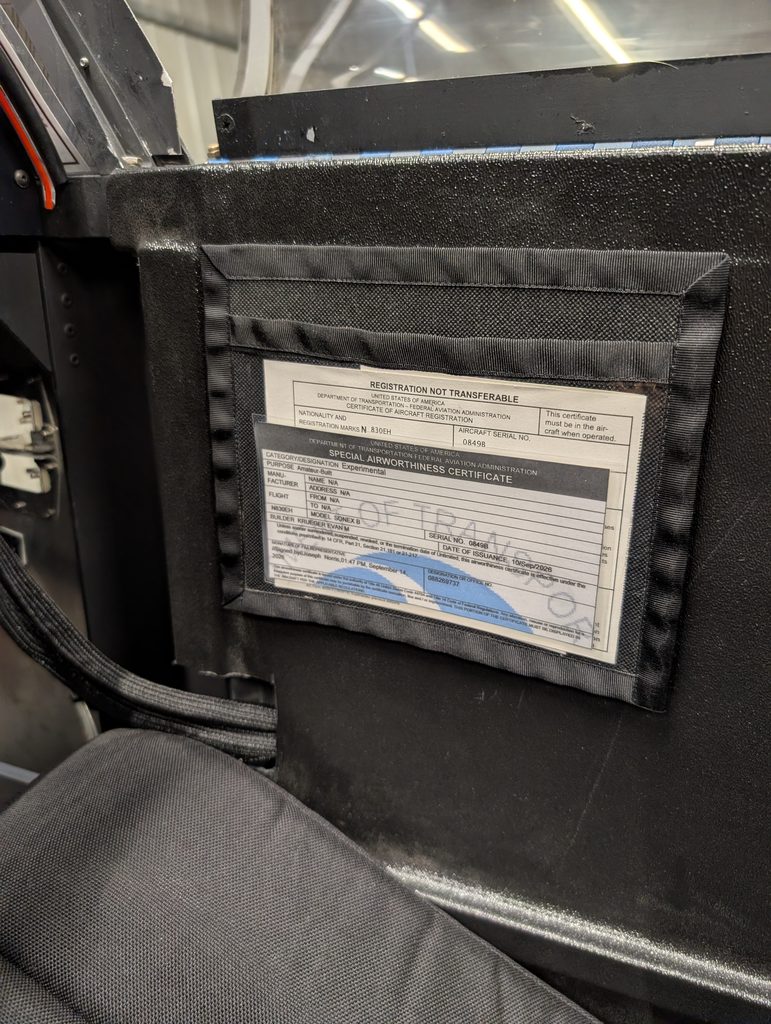
The actual airworthiness certificate came via email a few days later after the paperwork and inspection was processed in the AWC system. I placed my freshly printed airworthiness certificate and operation limitations in the document pouch and voila; we now officially have an airplane and not just piles of aluminum!
Leave a Reply