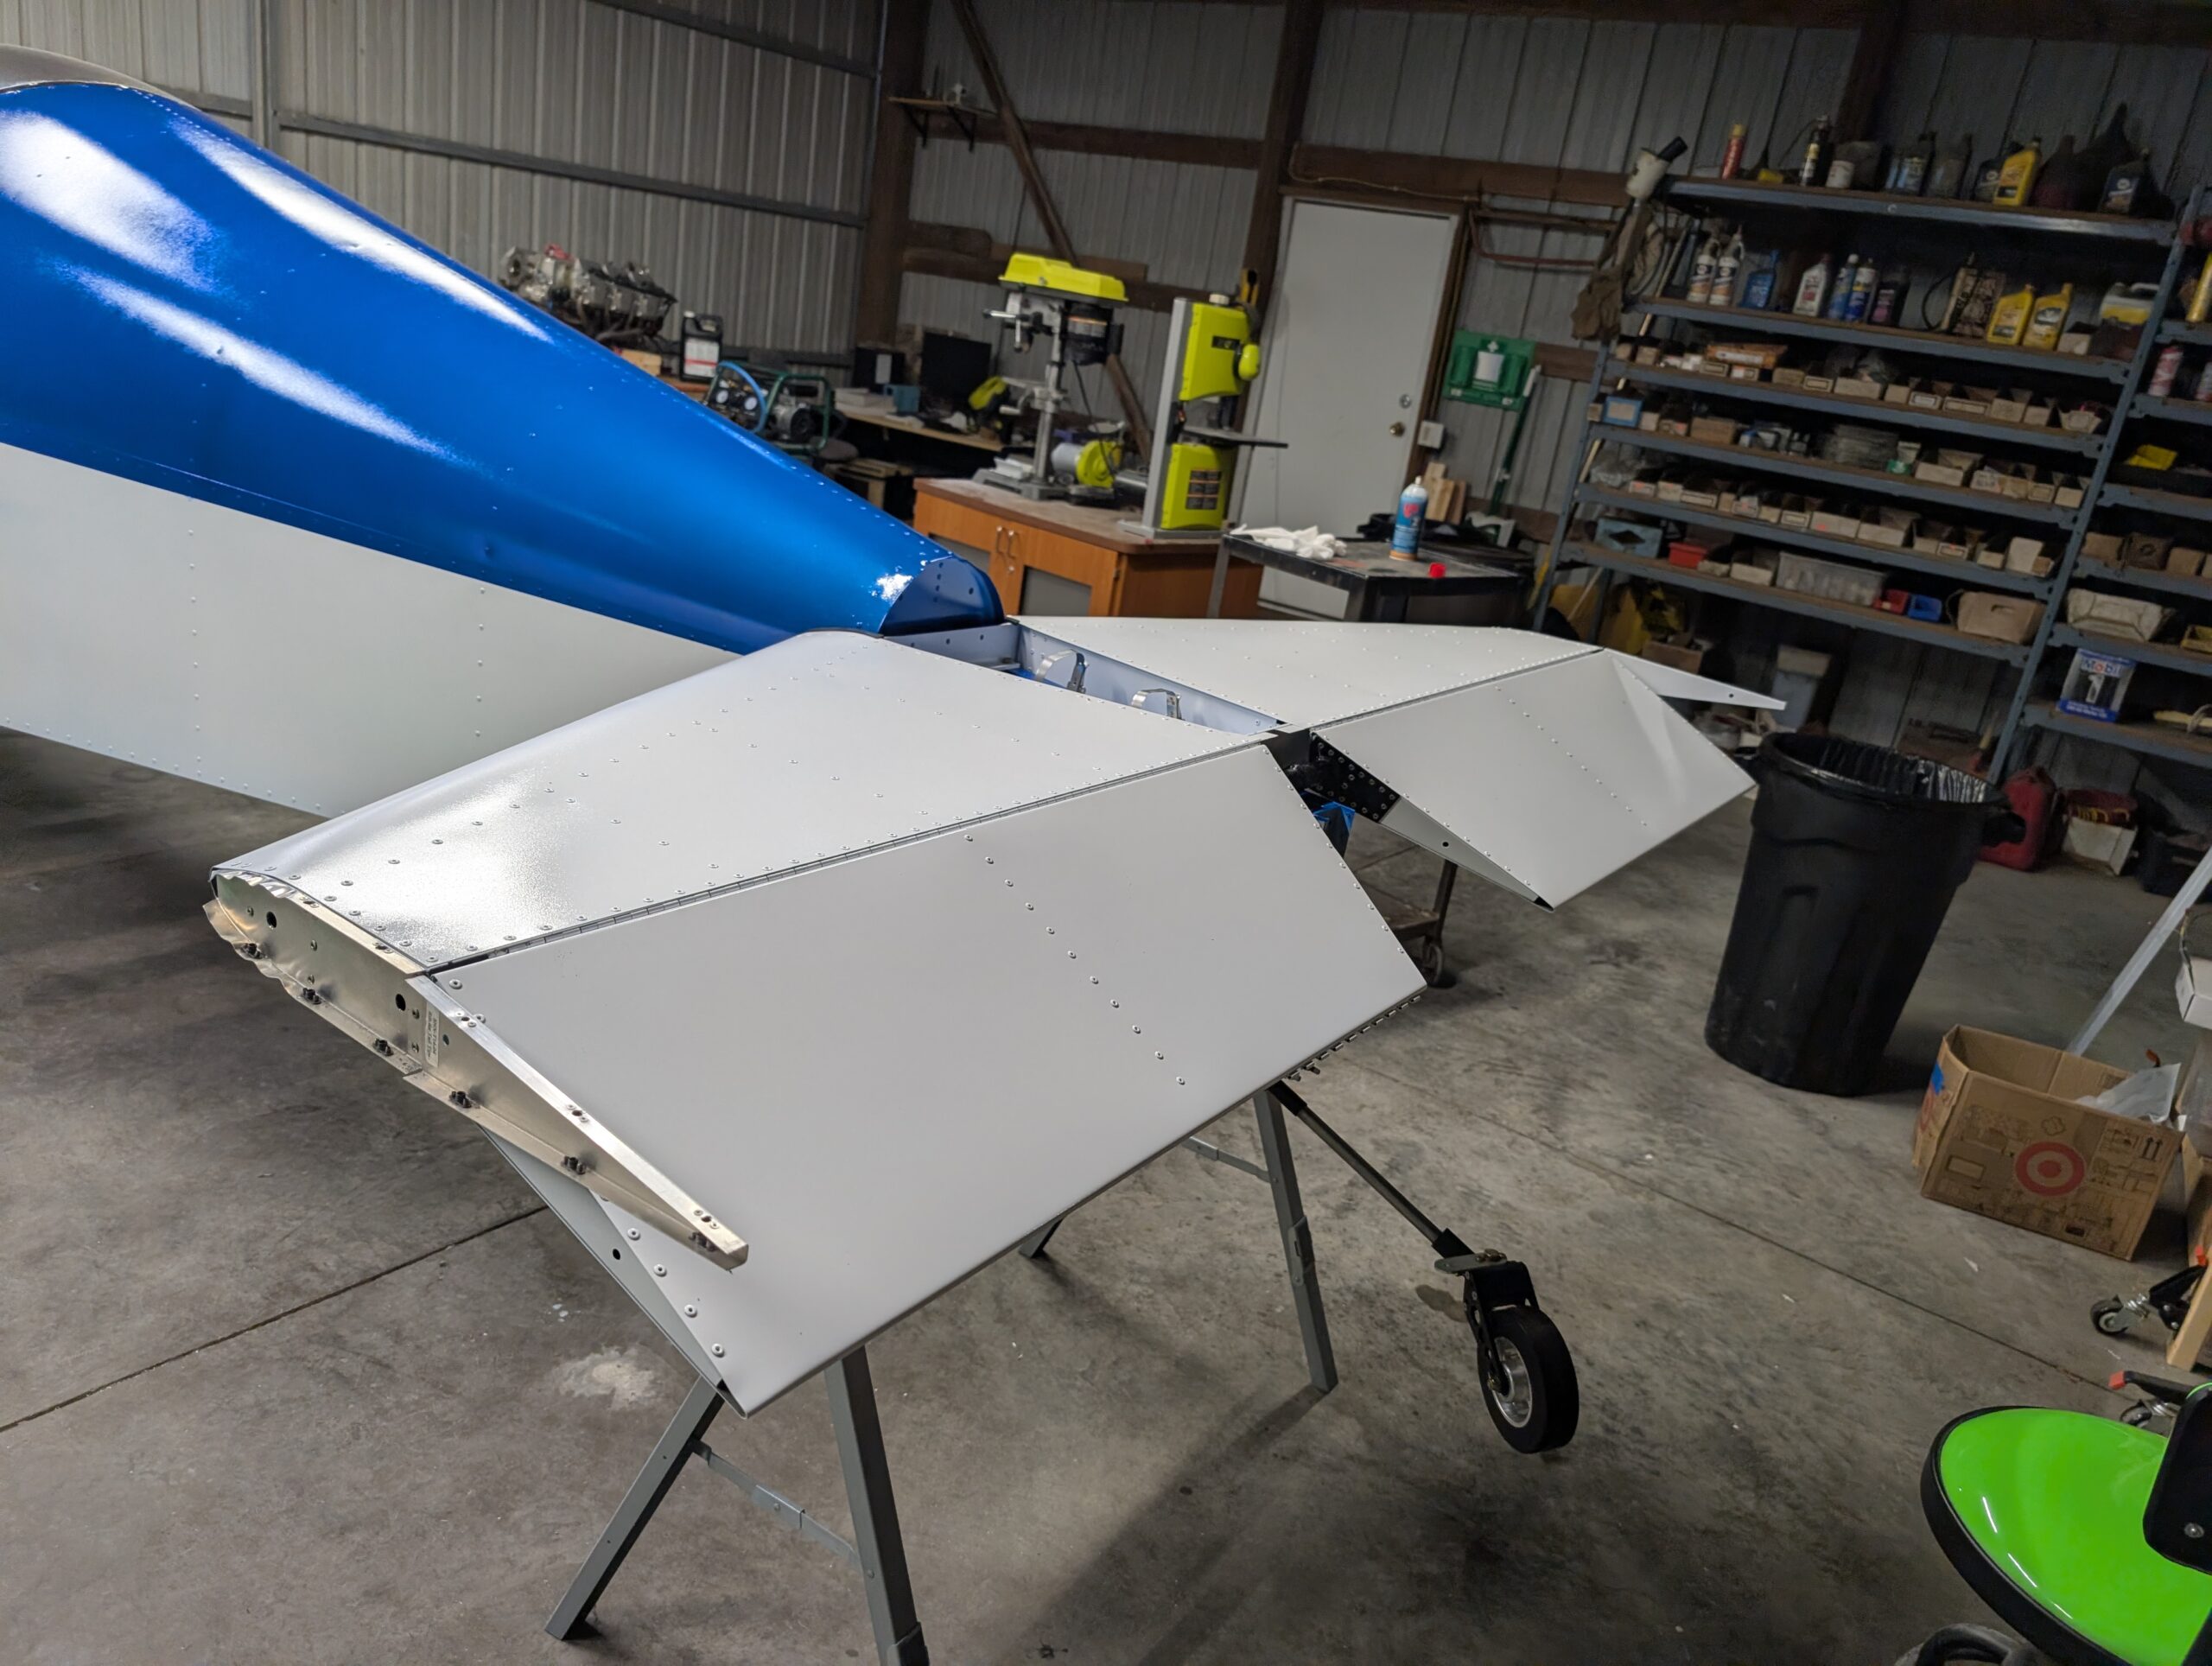
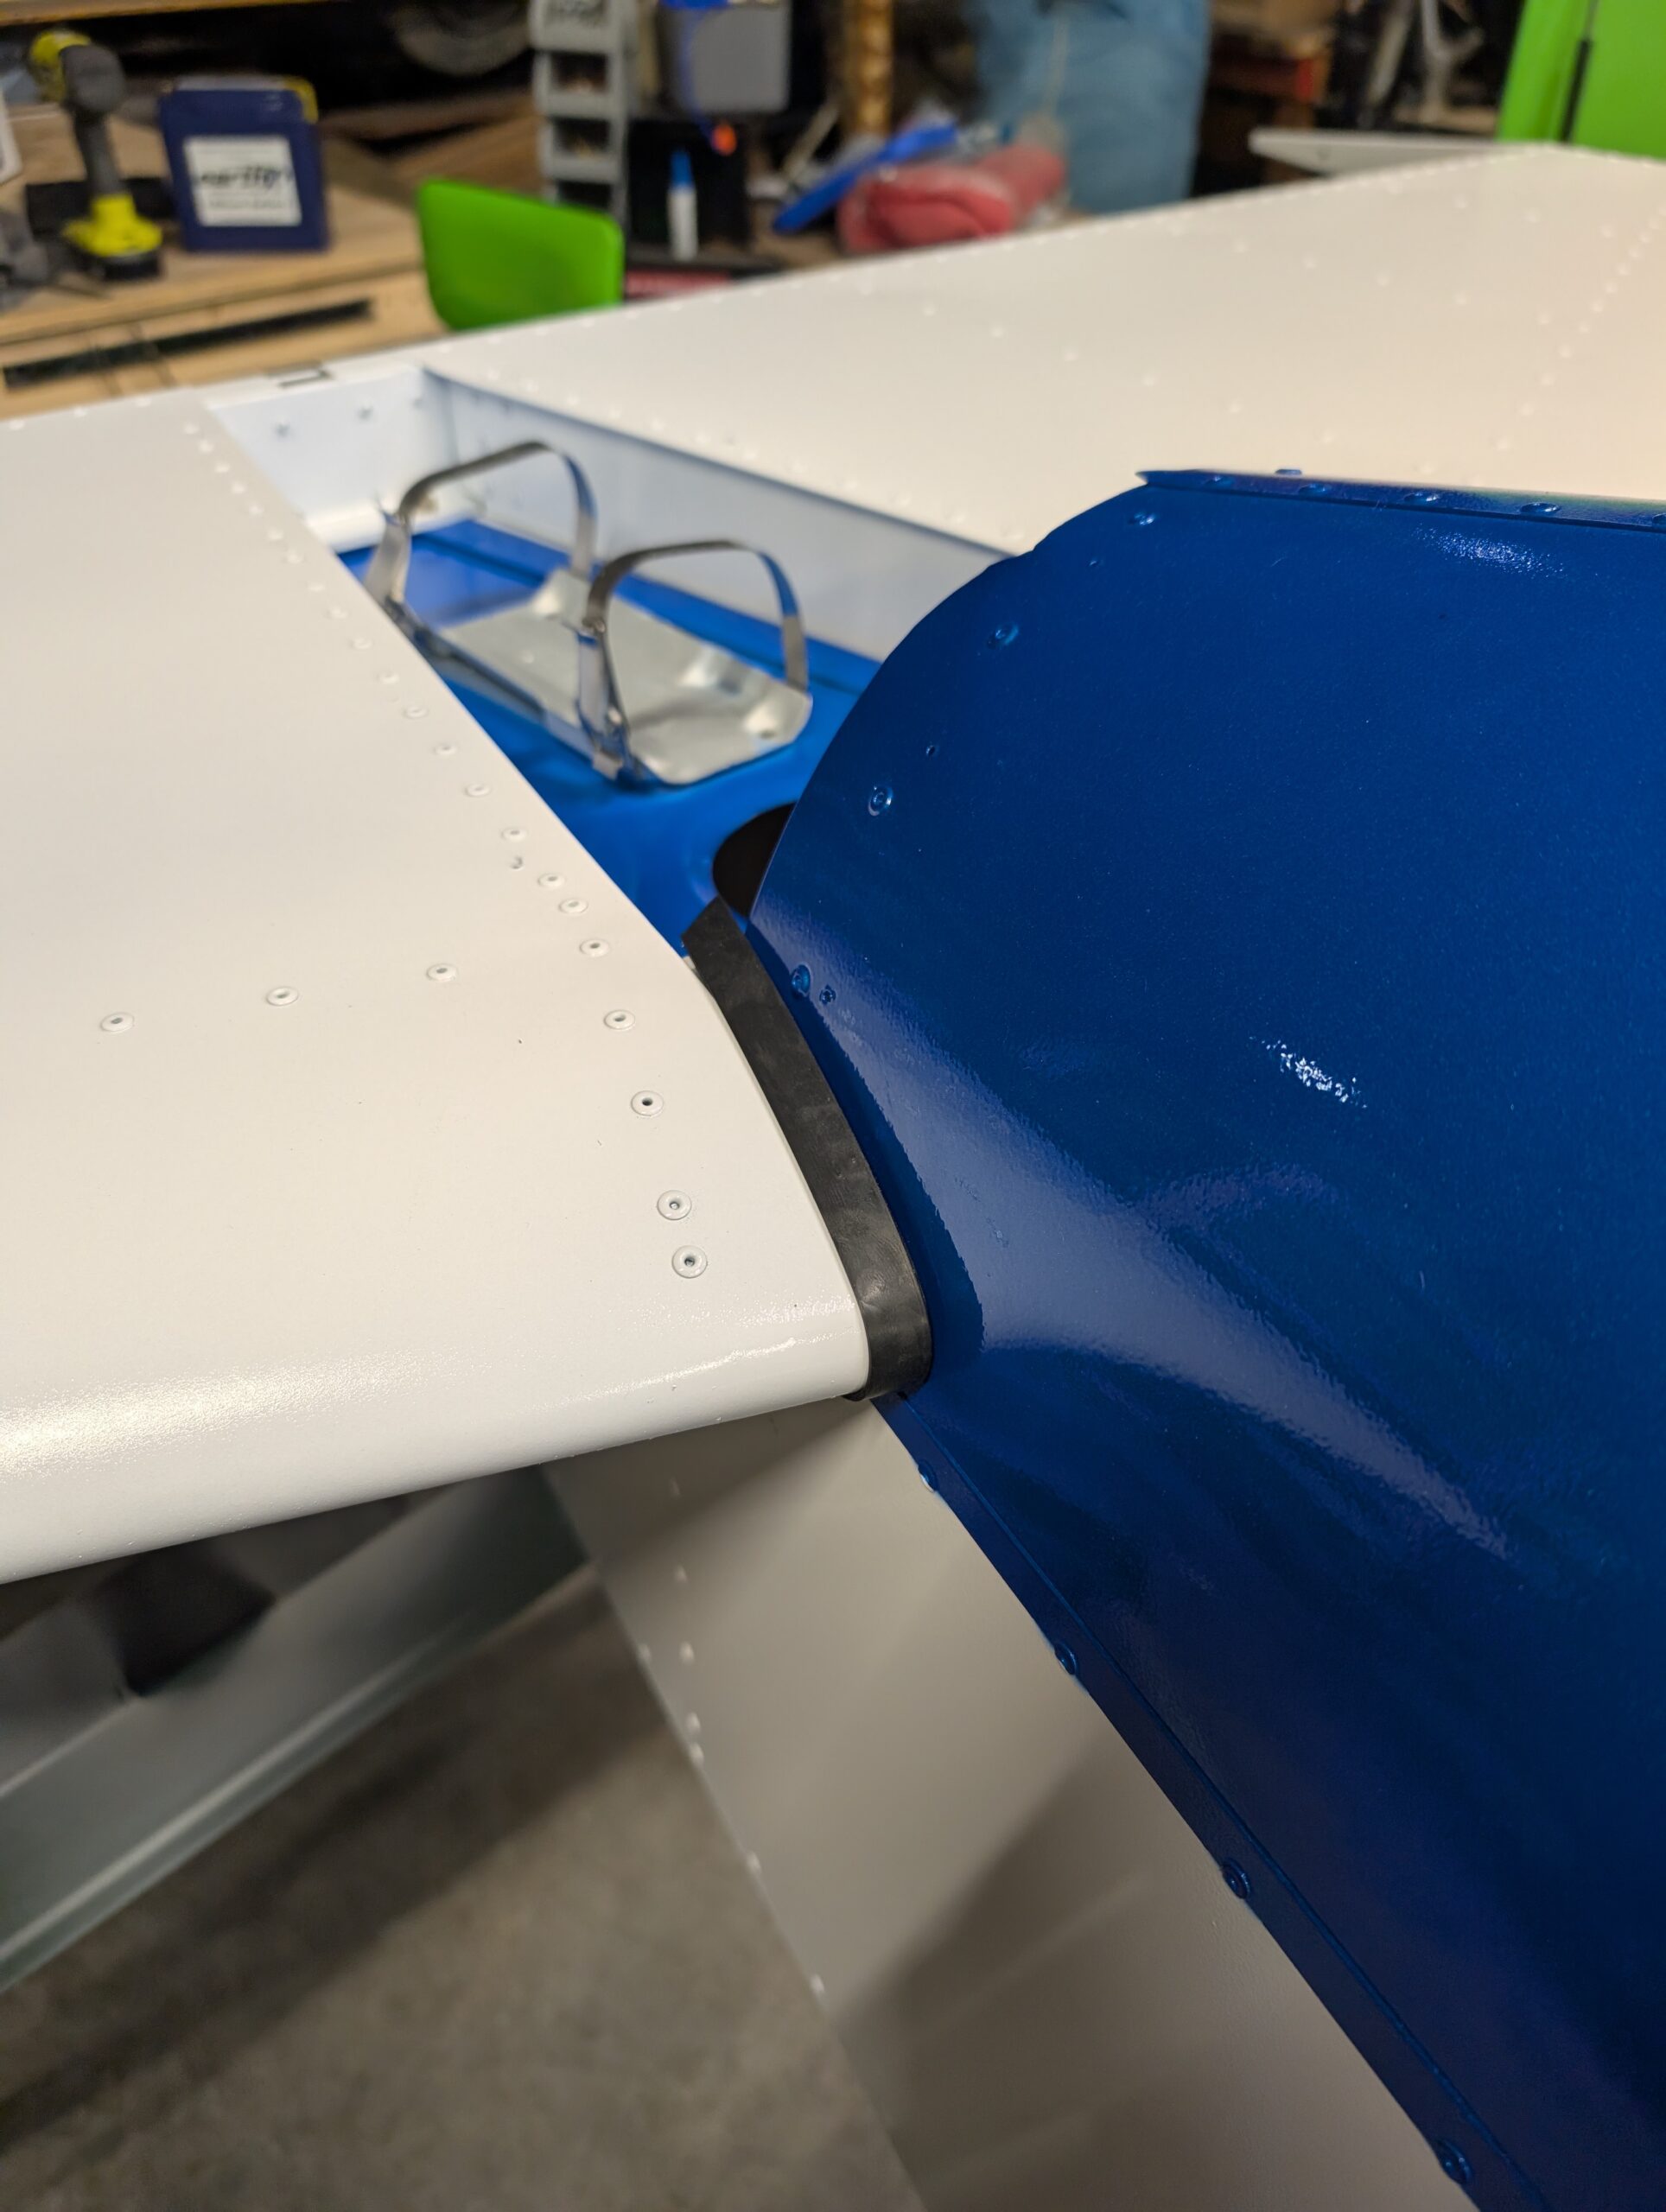
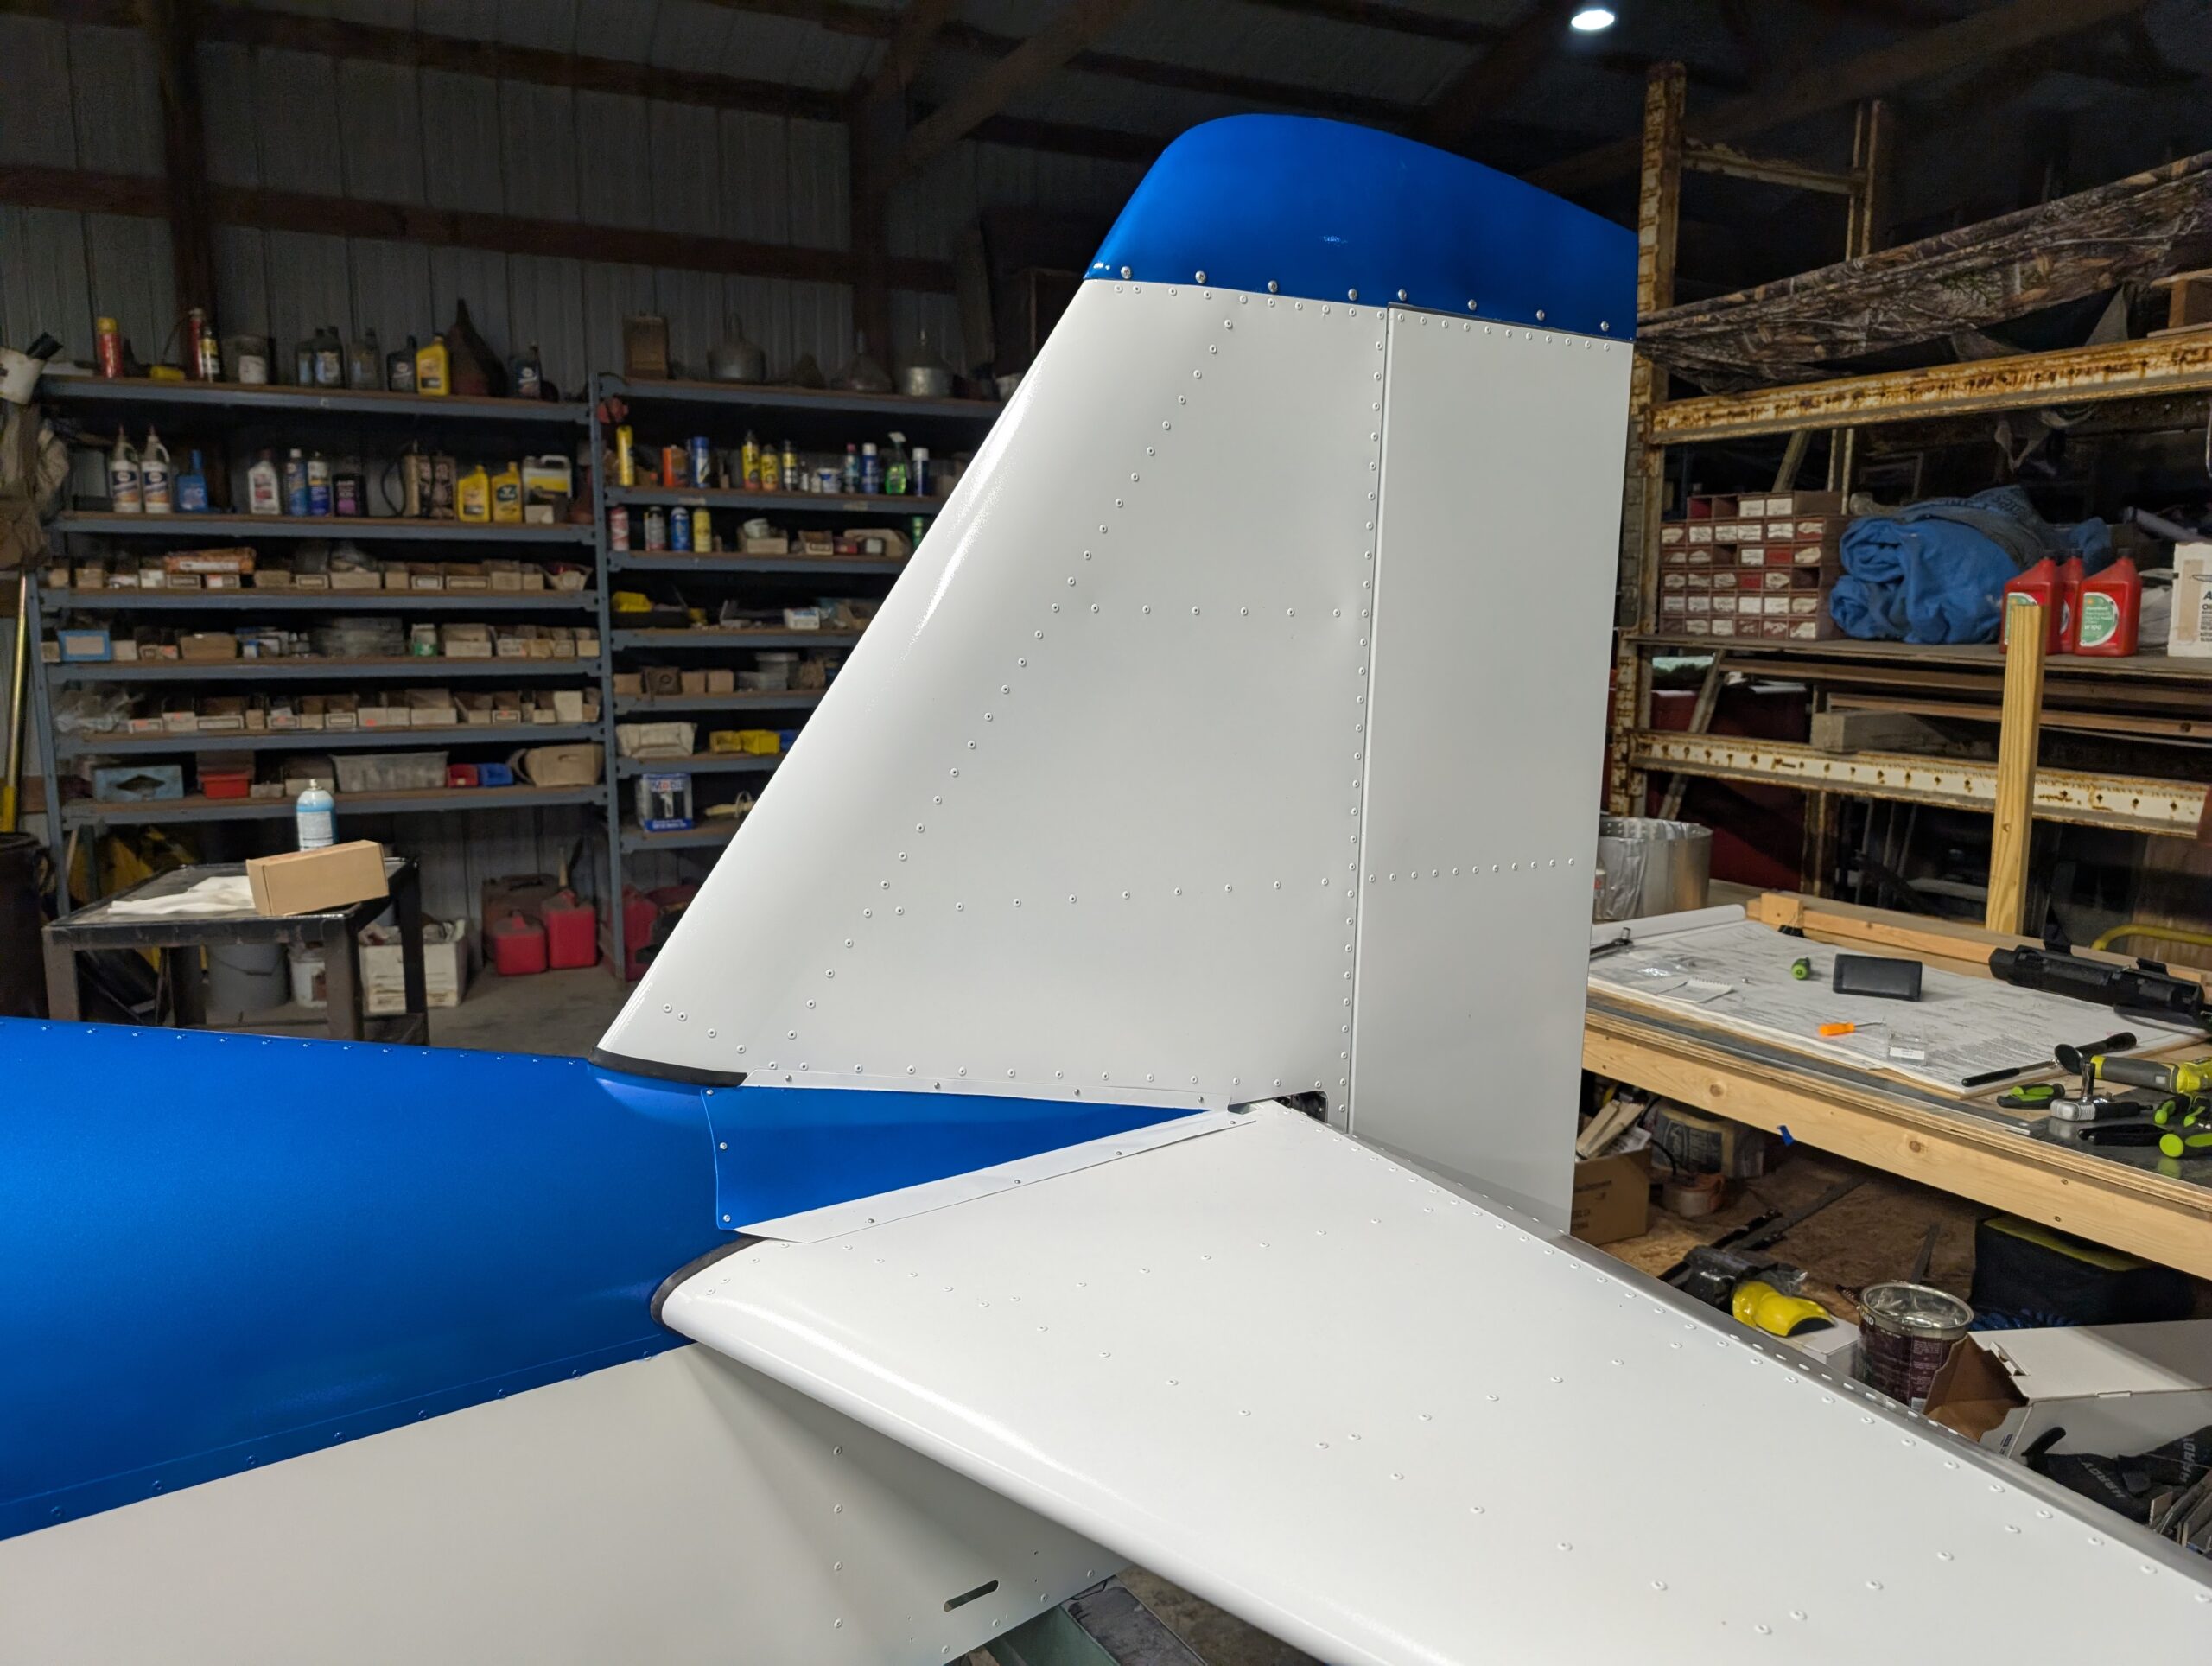
Silger Sonex

Build Log for Sonex 0849B

  • Build Log
  • Tasks
  • Stats
  • About
  • Contact Me
  • Tail Fairing Panels – Part 2

    Tail Fairing Panels – Part 2

    October 4, 2025

    |

    SNB-T01: Tail Installation

    Continued to work on tail fairing panels by annealing panels via sharpie method; scribbled sharpie on the panels then heated them via torch until sharpie marks began to disappear. After annealing, worked panels over a couple scrap pieces of pipe…

    More Details…

  • Canopy Installation – Part 1

    Canopy Installation – Part 1

    October 4, 2025

    |

    SNB-D01: Canopy/Windscreen Installation

    Began final canopy installation by drilling the rest of the hinge rivet holes in the upper longeron and installing rivets. Quick painted the rivets by hand with a brush along with other minor touchups of black paint. Updrilled canopy hinge…

    More Details…

  • Tail Tip Fairings – Part 1

    Tail Tip Fairings – Part 1

    October 4, 2025

    |

    SNX-T14: Tail Tips

    Began prepping fiberglass tail fairings for final fit by marking front overhang on each fairing to note how much filler will be needed to recontour the leading edge. Removed fairings from the tail and used SuperFil to build up inside…

    More Details…

  • Tail Fairing Panels – Part 1

    Tail Fairing Panels – Part 1

    October 4, 2025

    |

    SNB-T01: Tail Installation

    Began working on the tail fairing panels by cutting out template from plans on poster paper and mocking it up on the fuselage. Because the tail skin was installed upside down and needed extra trimming, will need to modify plans…

    More Details…

  • Broken Tap Extraction

    Broken Tap Extraction

    October 2, 2025

    |

    SNB-D01: Canopy/Windscreen Installation

    Spent most of the time getting the broken off tap out of the canopy frame. Tried to remove it with cutting fluid, heat, and punches but would not budge. Ended up purchasing two solid carbide drill bits and slowly drilling…

    More Details…

  • Canopy Trimming – Part 4

    Canopy Trimming – Part 4

    September 30, 2025

    |

    SNB-D01: Canopy/Windscreen Installation

    Updrilled canopy alignment holes in upper longeron with #F drill bit. Continued to trim, sand, and deburr canopy to achieve 1/16″ gap all around; finally achieved. Worked on latch mechanism by removing lower nylon washers to lower latch assembly slightly.…

    More Details…

  • Canopy Trimming – Part 3

    Canopy Trimming – Part 3

    September 27, 2025

    |

    SNB-D01: Canopy/Windscreen Installation

    Continued to trim and fit canopy. Matched drilled final holes in LH side of forward and aft canopy bows and realized that canopy was pulling up the frame in the front by about 1/4″. Unbolted front left corner of canopy…

    More Details…

  • Canopy Trimming – Part 2

    Canopy Trimming – Part 2

    September 24, 2025

    |

    SNB-D01: Canopy/Windscreen Installation

    Continued to trim canopy by taking small bites with 80 grit sandpaper and scotchbrite die grinder. Cleaned edges with deburring tool after each cut. Trimmed canopy so that majority of it would fit in between windshield and turtle deck. Once…

    More Details…

  • Canopy Trimming – Part 1

    Canopy Trimming – Part 1

    September 19, 2025

    |

    SNB-D01: Canopy/Windscreen Installation

    Started the tedious process of fitting and trimming the canopy. Started by marking the center of the front and rear edges of the canopy and aligning them with the fuselage center line. Scooted canopy up to the front and marked…

    More Details…

  • Canopy Frame Installation

    Canopy Frame Installation

    September 19, 2025

    |

    SNB-D01: Canopy/Windscreen Installation

    Began assembling canopy frame to fuselage by locating canopy frame hinge on RH longeron. Since clecoes would impede placing the canopy frame on the hinge, installed three rivets in the canopy frame hinge to make it easier to remove (if…

    More Details…

  • Fresh Air Vents

    Fresh Air Vents

    September 16, 2025

    |

    SNB-F01: Fuselage Complete

    Rather than installing round vents in the windshield as is shown in the plans, decided to use the Vans vent sidewall kit. Worked on fresh air vents by cutting apart components from Vans vent kit and cleaning edges of parts.…

    More Details…

  • Windshield Installation – Part 6

    Windshield Installation – Part 6

    September 16, 2025

    |

    SNB-D01: Canopy/Windscreen Installation

    Finished installing windshield onto fuselage by installing screws from front to back, skipping last bottom screw on each side. Aligned windshield bow with top center screw and installed sandwiching strap in between. Needed to run tap through each screw hole…

    More Details…

←Previous Page
1 2 3 4 5 6 … 31
Next Page→

Categories

  • Canopy and Windshield
  • Controls
  • Electrical
  • Everything Else
  • Fuselage
  • Landing Gear
  • Powerplant
  • Tail
  • Wings

Silger Sonex

Build Log for Sonex 0849B

Get in touch with me

Warning: The information and documentation provided on this blog regarding the construction of an experimental aircraft are for reference and informational purposes only. The author assumes no liability for any injury, death, or damage resulting from the use of this information. Build and operate at your own risk.